Image Viewer
This screen serves two purposes. It allows the user to specify images (of the census page, birth certificate, etc.) to add as multimedia records to the GEDCOM file and link to the entry being created and also serves as a convenient way to view the images while transcribing the information on them.
To access the image viewer click on the Add/View Images link on the main form.
Adding an image
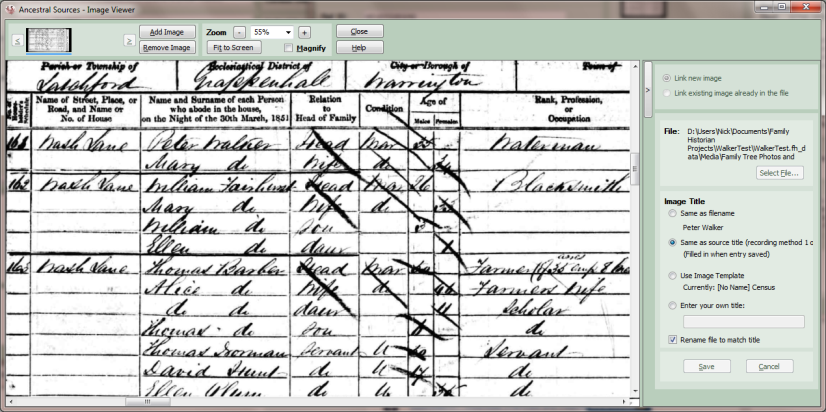
To add an image use the panel on the right-hand side of the image viewer screen. You can choose to either add an entirely new image or link to an image that already exists as a multimedia record within the file. Once the image is selected it will be displayed in the main part of the viewer screen. You can choose to attach other types of file if you wish (e.g word documents) but these won't be displayed in Ancestral Sources (or indeed in Family Historian). As an alternative to selecting a file using the standard dialog, it is also possible to 'drag and drop' a new image onto the main part of the viewer screen from Windows File Explorer. There is also another alternative which is to paste an image from the Windows clipboard, using the Paste button which appears next to the Select File button.
If the option to add a new image has been selected then the title to be given to the multimedia object to be created should be specified. The title can either be set to match the file name of the image (unless the image was pasted), the title on the main form (which only makes sense if using recording method 1 for the current entry type), the image title template set on the Options screen or your own title can be entered. Note that if the panel is quite narrow, you may not see all of the previewed title - point at the previewed title with the mouse and a tool-tip will display the full title.You may also decide to tick the rename file to match title option. If this is ticked then when the entry is saved the file will be renamed to whatever the title is set to be. You can also optionally add keywords to be associated with this image. Either click on the ... button to enter the keywords or type them directly into the text box separated by commas. Note that keywords are not supported in versions of Family Historian earlier than version 4.
If you are using an image title template that includes the {IMAGEINFO} tag, then you can use the Additional Information box to enter text to include in the multimedia object title and the name of the file if the rename option is ticked. For example, you may have a parish record source for a baptism which exists as a parish record and also a 'Bishops Transcript' copy. You could attach both images and use the Additional Information to label one of them 'Parish Record' and the other 'Bishops Transcript'. Or you might have a long and a short version of a birth certificate and both could be attached using the additional information to distinguish between them. The default image title templates include the {IMAGEINFO} tag in brackets at the end, but if additional information is not entered then Ancestral Sources will automatically remove the unnecessary () brackets that would otherwise appear.
Once these settings are selected click on Save to link this image to the entry: you will see a thumbnail version of the image displayed at the top of the image viewer screen and also in the Linked Images panel on the main screen.
If you are using a Family Historian project and the image is within the Media folder within the project file then it will automatically be saved as a relative file path. If the image is not within the media folder then you will be given the option to move the file into the project media folder.
To add further images you can click on the Add Image button at the top of the screen.
If you change your mind and no longer want to link an image make sure it is the current image (click on the thumbnail if it isn't) and click on the Remove Image button.
To edit the title or rename options on an image then simply change the settings for the image and then click on save.
You can hide the right-hand panel so that you can see more of the image by clicking on the tall/thin button which is next to the top panel. Click on this again to reveal the panel.
If you tick Always on top then the image viewer will stay on top of the main screen. By carefully positioning the image window this can make it easier to view the image while you transcribe the data on the main screen.
Viewing Images
There are options to zoom into or out of the image, to resize the image so that it fits onto the screen. If Magnify is not ticked then you can drag the image around the screen by holding down the left mouse button when the pointer is over the image and then moving the mouse. If magnify is selected then holding down the left mouse button and moving it over the image will cause a small panel to magnify the portion of the screen that the mouse pointer is over. Right-click over the image to reveal a pop-up menu with the same options described above. You can also move around the image using the scroll bars. In addition there are short-cut keys that can be used to move around the image:
+ Zoom in
- Zoom out
Cursor keys Scroll around the image
Home Move scroll bar to show top of image
End Move scroll bar to show bottom of image
Ctrl+Home Move scroll bar to show left side of image
Ctrl+End Move scroll bar to show right side of image
Ctrl+Mouse Wheel Zoom in/out of the image
Escape Close the form