Options - Monumental Inscription Settings
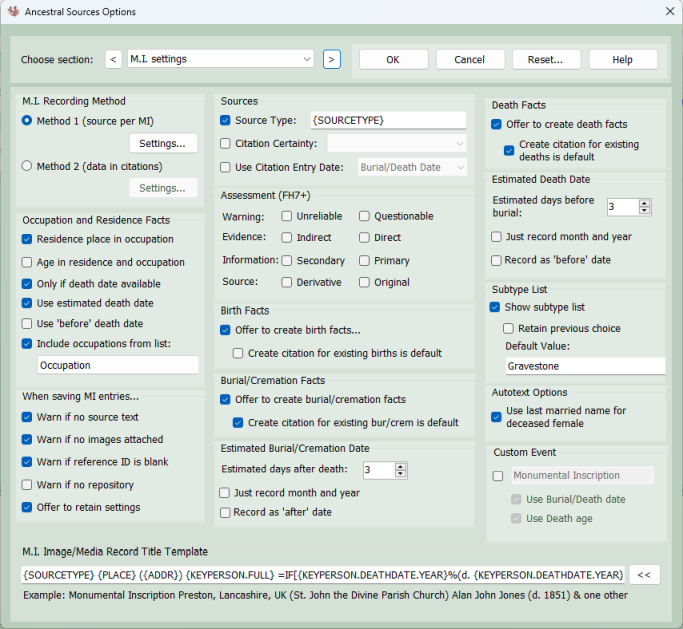
Monumental Inscription Settings
Recording Method 1 or Recording Method 2
Method 1 is the default method in Ancestral Sources. With this method a separate source is created for each monumental inscription record (e.g a transcription of a particular gravestone).
A source title might be:
Monumental Inscription Preston, Lancashire (St John the Devine Parish Church) Alan Jones (d. 1871) and two others
This is probably the best method to choose if you want to keep a transcript of each burial record within your GEDCOM file as the source text can be used for this purpose. This is also probably the best method if you want to link an image of the original MI record to the entry.
Ancestral Sources will automatically create the source based on details entered by you. For each deceased individual it may create a burial or cremation event and perhaps death, occupation, residence, and birth events. All of these facts will be linked back to the source record using citations.
This method will result in you potentially having hundreds of sources in your GEDCOM file, one for each MI entry you create.
Using method 2 a source usually refers to a burial location. A source title might be:
Monumental Inscriptions Preston, Lancashire, UK (St John the Devine Parish Church)
This is probably the best method if you don't want to record a transcript of each burial entry within your GEDCOM file. If you do want to do this then this method can still be used but will result in larger files as the transcript will appear multiple times within citations.
For the deceased individual Ancestral Sources may create a burial or cremation event and perhaps death, occupation, residence and birth events. All of these facts will be linked back to the source record using citations.
This method will usually result in you having very few sources in your GEDCOM file but a lot of repeated information in citations.
In the author's opinion if you want to record a transcript of each monumental inscription and/or include links to images of the MI then Method 1 is probably the best choice. If however you just wish to record the details without going to the trouble of including a transcription then you could use Method 2.
Please note that some users refer to Method 1 as 'Splitter Sources' and Method 2 as 'Lumper Sources'. This is because Method 1 users split their data across multiple sources, whereas Method 2 users lump lots of entries together under a single source.
Occupation and Residence Facts: When creating an occupation fact for the deceased, the address is not filled in as it is unlikely that the place where the individual lived was also the address of their work-place. However, there is a good chance that they worked in the same town/village. If the Residence place in occupation option is selected then the place recorded as residence, if applicable, will be recorded in the occupation place too. Age given in an MI source is frequently not accurate and in the author's opinion, the age given is not really relevant to the residence or occupation and therefore should not be recorded in a residence or occupation fact generated from an MI. However, there is an option to Record individual age in residence and occupation for those who wish to do this. By default an occupation or residence will not be created if a date of death is not recorded. However, if the Only if death date available option is unticked then an occupation or residence will be created without a date. If a date of death is not given, but a burial/cremation date is present then if use estimated death date is ticked then an estimated death date will be used for the occupation/residence. If use before death date is ticked then the date will recorded as 'before' the date of death (whether given or estimated).
By default, the list of occupations will include those specified in the Occupation list defined on the Edit Lists screen. You can edit that list yourself or even specify a list of occupations that can differ from source to source by creating a new list and choosing the name of the list on this options page.
Warnings when saving entries: It is possible to forget to enter all of the source data. You can opt to have Ancestral Sources warn you if you forget to enter source text, select images, enter a reference ID, select a repository, or enter a registration date.
Offer to retain settings: If this is ticked the Retain Data screen will be shown after an entry is saved.
Source Types: The text entered here will be recorded in the Source Type tag for any death sources created. The source type is a Family Historian extension to GEDCOM. By default the source type uses a tag {SOURCETYPE} which will be Monumental Inscription. Alternatively, you could change the tag to {SOURCESUBTYPE} if you want the source type to be based on the value selected from the Type drop-down list, e.g. gravestone. Or you could just enter your own custom text into this field.
Citation Certainty: If this option is selected then the reliability assessment will be recorded with each citation created. See also the Assessment (FH7+) option below.
Use Citation Entry Date: If this option is selected then for each individual their death date (or estimated death date from burial date) will be recorded in the GEDCOM entry date field in every citation. Some users prefer to use this field to record the date that they entered the information into Ancestral Sources. This is not the intended use of this field as specified in the GEDCOM standard but an option is there for those users who choose to use it for this purpose.
Assessment (FH7+): Family Historian 7 introduced new citation assessment/certainty options. If your file is a Family Historian 7 (or later) file and any of these options are selected then these will be added to all citations created for burial sources. This will override the Citation Certainty option (see above). If none of the assessment options are ticked then the Citation Certainty option will apply instead.
Birth Facts: With the default settings, when saving a monumental inscription entry Ancestral Sources will give you the option to create or modify a GEDCOM birth fact for the deceased (age or date of birth and/or birth place are sometimes recorded in a MI). The create citation for existing births is default setting dictates whether the create citation for birth tickbox is ticked by default on the birth screen when opting to not change an existing birth event. See the help page for the Birth Events from Entry screen for more details.
Burial/Cremation Facts: With the default setting, when saving an entry you will be given the option to create or modify a GEDCOM burial/cremation fact for the deceased using the Burial/Cremation Events from Entry screen. The create citation for existing burial/cremation is default setting dictates whether the create citation for burials/cremations tickbox is ticked by default on the burial/cremation screen when opting to not change an existing burial/cremation event. See the help page for the Burial/Cremation Events from Entry screen for more details.
Estimated Burial/Cremation Date: When a MI record is saved, Ancestral Sources will give you the option to create a burial/cremation fact. If a date of death is recorded but a burial/cremation date is not present then you will be offered the chance to create an estimated burial/cremation date instead. You can set the number of days after the death to use as the estimated date, by default this is 3 days. You can opt to just record month and year if you wish. Note that this is based on the number of days after the death. e.g. if a death happened on 30 April 1801 and Estimated days after death was 3 and Just record month and year was ticked then the suggested estimated date of death would be May 1801. If you want the estimated month and year to always match the death record then you should set the estimated days value to 0. If record as 'after' date is selected then the suggested burial/cremation date will be an after date rather than an estimated date. If you wish to just record burial/cremation date as being after the funeral date then set the estimated days value to 0.
Death Facts: With the default setting, when saving an entry you will be given the option to create or modify a GEDCOM death fact for the deceased using the Death Events from Entry screen. The create citation for existing deaths is default setting dictates whether the create citation for deaths tickbox is ticked by default on the death screen when opting to not change an existing death event. See the help page for the Death Events from Entry screen for more details.
Estimated Death Date: When a MI record is saved, Ancestral Sources will give you the option to create a death fact too. If a date of death is not recorded but a burial/cremation date is present then you will be offered the chance to create an estimated death date instead. You can set the number of days before the burial/cremation to use as the estimated date, by default this is 3 days. You can opt to just record month and year if you wish. Note that this is based on the number of days before the burial/cremation. e.g. if a burial/cremation happened on 1st May 1801 and Estimated days before burial was 3 and Just record month and year was ticked then the suggested estimated date of death would be April 1801. If you want the estimated month and year to always match the burial or cremation record then you should set the estimated days value to 0. If record as 'before' date is selected then the suggested death date will be a before date rather than an estimated date. If you wish to just record date of death as being before the funeral date then set the estimated days value to 0.
Note that this same estimated death date options will be used when creating residence and occupation facts that are derived from a burial record where date of death is not recorded.
Subtype List: All source types other than Census have the option to display the subtype list on the main screen. For example this allows you to specify if a MI is a gravestone, Headstone, Monument, etc. The contents of these lists can be modified on the Edit Lists screen. There are options to specify the default value to show and whether to retain the previously selected list item each time.
Autotext: If use last married name for deceased female is ticked then the last married name for the individual will be used in autotext entries. If it is not ticked then the their primary name in the GEDCOM file will be used.
Custom Event: By default, MIs can generate death facts, burial facts, occupations, etc. based on the information provided. However, there isn't a standard GEDCOM event to represent the presence of a monumental inscription. This option allows you to specify a custom event to be created whenever an individual appears in a MI record. There is an option to use the death date or burial date (if present) as the date for the custom fact. If this option is not ticked then a date will not be included. There is also an option to record the individual's age if this is included in the MI.
Image Title Template: When linking images to a MI record using the Image Viewer there are options to name the multimedia record and optionally rename the image file to match. One of the options is to create a title based on the Image Title Template. You can type the title template into the box and select tags from the list to include within the template. So, for example, If the template was: {SOURCETYPE} {PLACE} ({ADDR}) {KEYPERSON.FULL} =IF[{KEYPERSON.DEATHDATE.YEAR}%(d. {KEYPERSON.DEATHDATE.YEAR})%] =IF[=OR[=EQUALS[{PERSONCOUNT}%1]%=EQUALS[{PERSONCOUNT}%0]]%%=IF[=EQUALS[{PERSONCOUNT}%2]% & one other% & =WORDNUM[=SUB[{PERSONCOUNT}%1]%1] others]] ({IMAGEINFO}) then the {SOURCETYPE} would be replaced by Monumental Inscription, {PLACE} and {ADDR} will be replaced by the values entered into the MI place and addresstext boxes. {KEYPERSON.FULL} would be the name of the individual flagged as being the key person. The =IF[%%] function displays the data between the two % symbols if the data before the first % exists, otherwise it will display the data after the 2nd %. So if the Year of death is present it will be included. The second IF statement is more complex and uses other functions such as =OR, =EQUALS, =WORDNUM and =SUB (see the Template Keywords and Functions help page). This results in the title showing 'and one other', 'and two others',etc. depending on the number of individuals on the MI. When you add a new image there is an additional information box to optionally enter text to add to the image title replacing the {IMAGEINFO} tag. When adding multiple images to a source this could be used to distinguish between them. In the example above if the additional information textbox was left blank then Ancestral Sources will automatically remove the () brackets as they are unnecessary. Therefore the image might be given the name: Monumental Inscription Warrington, Lancashire (Warrington Cemetery) Jane Smith (d. 1851) & two others. Note that having a template specified here does not imply that the template will definitely be used. It will only apply if the appropriate option is chosen when linking an image on the Image Viewer screen. There are many other keywords and functions that can be used: see Template Keywords and Functions for further information.
Monumental Inscription Settings - Method 1
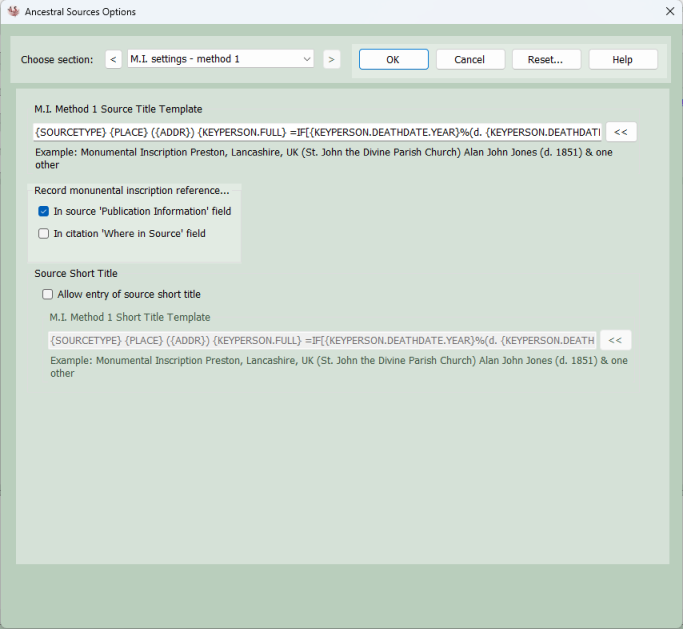
These settings are available if MI recording method 1 has been chosen on the Monumental Inscription Settings page.
Monumental Inscription Method 1 Title Template: When using method 1 a source is created for each entry, the name of this source is based on the template. So, for example, If the template was: {SOURCETYPE} {PLACE} ({ADDR}) {KEYPERSON.FULL} =IF[{KEYPERSON.DEATHDATE.YEAR}%(d. KEYPERSON.DEATHDATE.YEAR})%] =IF[=OR[=EQUALS[{PERSONCOUNT}%1]%=EQUALS[{PERSONCOUNT}%0]]%%=IF[=EQUALS[{PERSONCOUNT}%2]% & one other% & =WORDNUM[=SUB[{PERSONCOUNT}%1]%1] others]] ({IMAGEINFO}) then the {SOURCETYPE} would be replaced by Monumental Inscription, {PLACE} and {ADDR} will be replaced by the values entered into the MI place and addresstext boxes. {KEYPERSON.FULL} would be the name of the individual flagged as being the key person. The =IF[%%] function displays the data between the two % symbols if the data before the first % exists, otherwise it will display the data after the 2nd %. So if the Year of death is present it will be included. The second IF statement is more complex and uses other functions such as =OR, =EQUALS, =WORDNUM and =SUB (see the Template Keywords and Functions help page). This results in the title showing 'and one other', 'and two others',etc. depending on the number of individuals on the MI. Therefore the source might be given the name: Monumental Inscription Warrington, Lancashire (Warrington Cemetery) Jane Smith (d. 1851) & two others. . There are many other keywords and functions that can be used: see Template Keywords and Functions for further information.
Record monumental inscription reference: You can opt to record the reference id in the publication information field which is part of the source, or in the where in source field in every citation. Using the where in source option will result in the reference appearing in multiple places in the file which is not really recommended for method 1. So instead either use the publication information field or make sure you include the reference in the title template.
Source Short Title: If this option is ticked, the main screen will allow you to create a short title for a source as well as the usual long title. Although not selected by default, some users like to record a different short title for their sources and you can specify a title template for this. If this option is ticked the Title label on the main screen will become a link which allows you to toggle between viewing or editing the long title or the short title.
Monumental Inscription Settings - Method 2
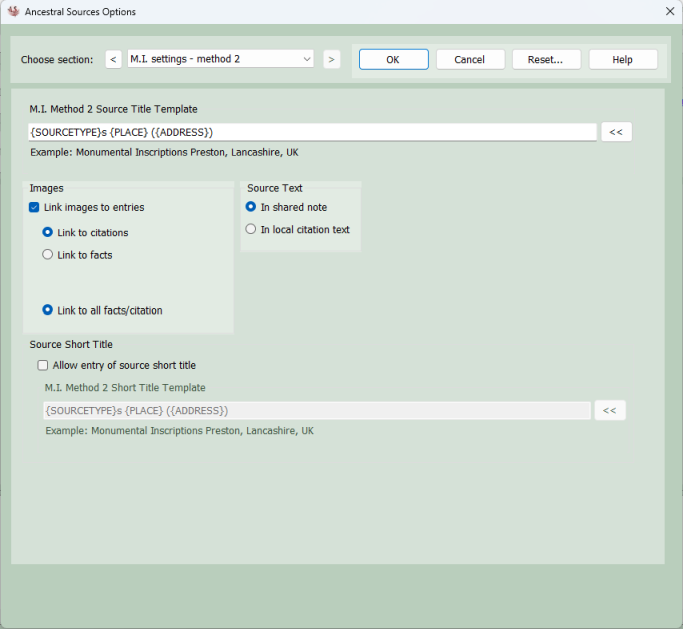
These settings are available if monumental inscription recording method 2 has been chosen on the MI Settings page.
Monumental Inscription Method 2 Title Template: Usually method 2 entries link to an existing source which might be called Monumental Inscriptions Preston, Lancashire. However, if this source doesn't exist the main screen provides the option to create a new source, the title of which is based on this template. You can type text into this template and select tags from the list to include within the template. These tags are then replaced with the appropriate values when the source is created. For example if the template was: {SOURCETYPE}s {PLACE} ({ADDRESS}) then the source created might be Monumental Inscriptions Warrington, Lancashire (Warrington Cemetery). Useful tags include: {ADDR} - Address field, {OTHER} - Other Information field, {PLACE} - Place field, {SOURCETYPE}. See Template Keywords and Functions for further information. It should be noted that it is unlikely that the {REF} or {KEYPERSON} keywords will be used in method 2 templates.
Images: If the option to link images to entries is ticked then the user can choose whether these images will be linked to the citation or to the fact itself. Technically there isn't really much difference between these two options.
Source Text: It is always recommended that method 1 should be used if transcriptions of the burial entries will be made. However, if a method 2 user wishes to record data in the source text field on the main screen then they can. The obvious option here might seem to be to record the data in the citation text field. However, a typical monumental inscription entry will probably lead to several citations being created (for burial, death, occupation, birth, residence, etc.) which would mean several separate copies of the source text being saved. Another option therefore is to create the source text within a note record and have a link to this note from each citation. This avoids the duplication of the source text. If the source text ever needed to be edited in the future it would only need to be edited in one place rather than in each of the citations.
Source Short Title: If this option is ticked, the main screen will allow you to create a short title for a source as well as the usual long title. Although not selected by default, some users like to record a different short title for their sources and you can specify a title template for this. If this option is ticked the Title label on the main screen will become a link which allows you to toggle between viewing or editing the long title or the short title. Please note that this option does not apply if templated sources are used (Family Historian v7 or later).